***PLEASE READ THIS ENTIRE PAGE BEFORE PROCEEDING***
****Also Note – Once you lock your cable to your VIN, our Terms & Conditions apply****
***********Attention!!! If you are NOT the first owner of your vehicle, it is possible that your vehicle could have been flashed previously. Some companies do things to the ECU processor that will not allow it to be read out via OBDII. Even if the ECU was flashed back to “stock” by these companies, the ECU still cannot be read. The only way to read out the ECU and fix this issue is in boot mode on the bench. To do this you must ship your ECU to us. We will then fix your ECU to work with the cable and return it back to you. We have NO control over this or a way of knowing if your ECU has been flashed previous to your purchase. This is the responsibility of YOU, the customer. Once the cable is locked to your VIN, the cable cannot be refunded.***********
Installing this software is the same as installing any WINDOWS application. If you have errors related to the USB Device, follow the instructions below and try to disable the driver signature. You may also have to install the driver separately. Installation does require you have administrator permissions. We will gladly help to the best of our ability, however we are not Windows technicians nor work for Microsoft. If you cannot get it to work on your computer, you may want to try another computer, different version of Windows, or have someone help you configure your PC.
If you have a DimSport MyGenius handheld unit, follow these instructions here instead.
If you have a Alientech Powergate 3 handheld unit, follow these instructions here instead.
For BMW F-Series follow these instructions here.
If you are flashing your VW/Audi DSG Transmission, follow these instructions here.
For Polaris ECU Flashing, follow these instructions here.
For Canam ECU Flashing, follow these instructions here.
If you are using the HP Tuners MPVI2, follow these instructions here.
****If you are a previous customer and your software application has expired, please go to the Download Here section and see the notes how to proceed and redownload the latest application.****
Getting Started: Once you receive your VRTuned Flash Cable Kit, follow these simple instructions to begin your ECU flash process. Make sure you view our instructional video below and follow each step as described for the read and write process. If the instructions are not followed, you could risk damage to your vehicles ECU. If your vehicle requires the ECU to be mailed in to be flashed, you may skip these instructions. We are always available for support and can even assist you remotely in the read/write process.
Required to flash: Our VRTuned OBDII flash client is pretty simple and direct. These are the things you will need to read and write to your vehicles ECU through the OBDII port.
- Flash Cable – This is included in your VRTuned Flash Kit. It uses a mini USB to standard USB cable that plugs into your computer.
- Flash Client – The software application that allows you to read and write via your OBDII port. This is program is installed like any program on your computer as a .exe file. The software is either saved on the included memory stick in your Flash Kit or emailed to you specific for your vehicle.
- Computer – You need to have a computer to install the flash client and connect the USB cable to. This can be any PC and we have heard of Mac’s working if booted up as a Windows machine. We cannot support this though. Because you need to connect the cable from your car to your computer, a Laptop or Tablet is required and should be plugged in while doing the process.
- Windows XP will not work
- Windows 7 requires a different driver. Once you install the program, access your device manager and update the driver or replace it with this one here.
- Windows 8 and up are acceptable and there are no RAM requirements. Each OS does install drivers differently so if you encounter a problem, please contact us.
- Windows 8 and 10 may require the need to do the driver deactivation. If you have a issue with the driver, or you get an error that says USB Device Not Recognized, first try to install the Device Driver here. If that does not work, follow the old driver deactivation process here – (CLICK HERE for tutorial).
- Battery Charger REQUIRED – Not a trickle charge, but a battery charger. It is highly recommended to have a battery tender or battery charger on the car during the read and write process.
- Email Address – Once you read out your car, you will need to send us your file (CLICK HERE UPLOAD YOUR FILE). We will then return your tuned file to this same email address unless otherwise specified.
- Internet connection is NOT required. We do recommend turning off any virus protection, screen savers, and closing all other programs during the writing process. Please make sure to disable ANY antivirus software and screensavers for the reading out and flashing process.
- And…. of course, the Software – Download Here
Now the Instructions:
Step 1 – Save the executable file that is located on the Download Here page above. (Note: There is nothing on the flash stick included. That is for saving your tuned and original files.) Double click the exe file to install the flash client to your computer and follow the prompts until it says completed. Once the installation is completed, you will then see a VR icon on your desktop.

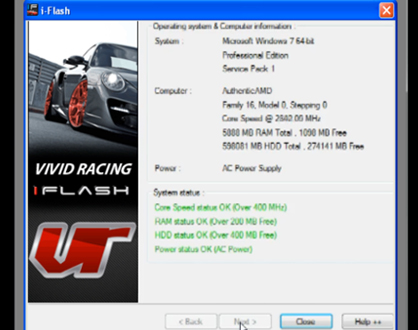
Step 2 – With the cable plugged into your laptop and into your OBDII port, turn your vehicle to the on position without starting it so all the lights are on your dash. Then double click the VR application icon to launch the program. It will bring up some legal mumbojumbo and just hit next to proceed. Then it brings up a intro screen and click on NEXT. It will begin connecting and identifying your computer. If you get a USB Device error or you get an error that says USB Device Not Recognized, follow the old driver deactivation process here – (CLICK HERE for tutorial).
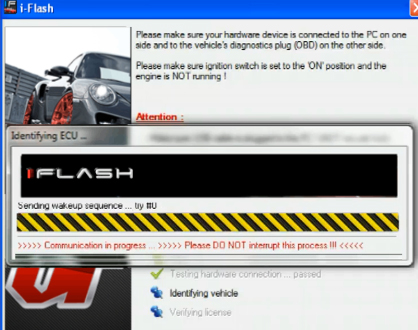
Step 3 – The next screen will begin the connection process to your ECU. It is essentially sending a signal saying, “hey lets connect”.
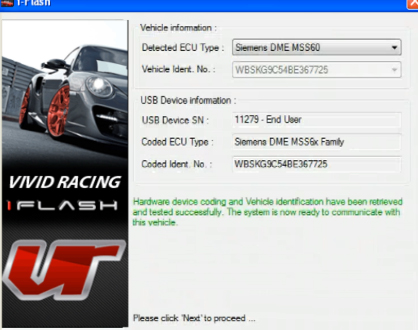
Step 4 – The flash client has now connected to your vehicles ECU and has identified your VIN and ECU type. If the ECU is not automatically recognized, select your ECU from the dropdown and then proceed. If you are not sure which ECU you have, please contact us or view the product page on our SHOP as we have listed the related ECU in the product description.
You will then press NEXT where you will have options to Read ECU Memory, Program ECU Memory, Restore ECU Memory, or Diagnostics. Click on to Read ECU Memory. Being curious and clicking other things might get you in trouble so follow the steps listed. You can click on Diagnostics and see if you have an Check Engine Lights before you do the flash and clear these codes.
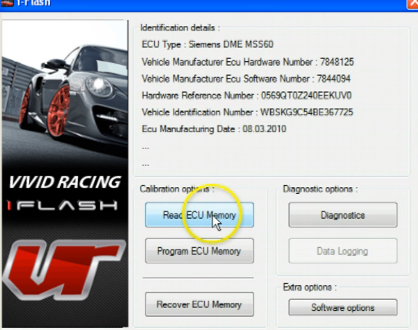
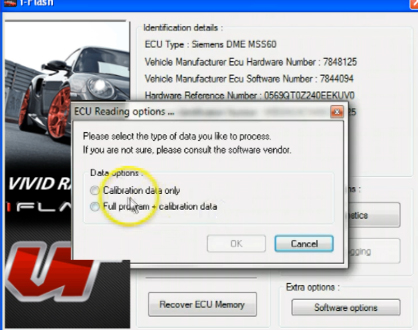
Step 5 – When you click Read ECU Memory, it will ask you if you want to read just the Data Area or the Full Program. Some cars can only program the data area and some you have to read out the full file. Please see notes on the software download page which you should do. We always recommend reading out the FULL program as well so you have a complete restore (original) for the recovery mode. This also saves the full ECU memory so if you have any issues during the write process, you can restore your ECU memory with this file.
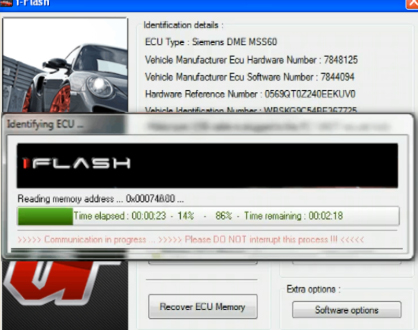
Step 6 – It will now ask you where you want to save your read out on your computer. DO NOT RENAME THE FILE. You can save this ANYWHERE you want, just remember where so you can email it to us! After you click save, it will start the read out process. Note: During reading and writing, the fans may turn on for some cars (mainly Porsche). Please make sure you have a battery charger to prevent power draw. This process may take anywhere from 5-20 minutes depending on the vehicle because it is reading the entire file. Testing on a E92 BMW M3 and a Porsche 997 Turbo, it averaged about 5-7 minutes.
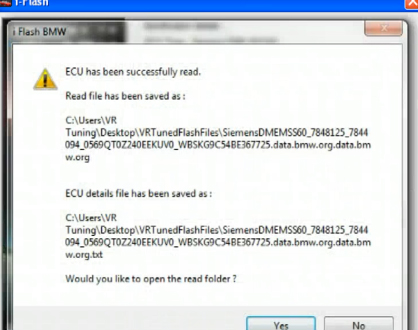
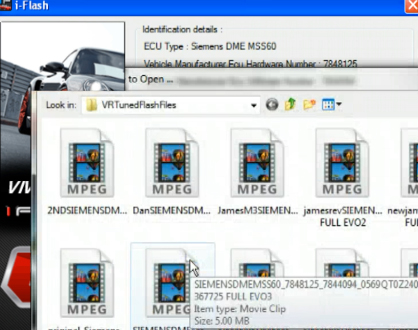
Step 7 – When the reading process is complete, it will show a successful message and ask if you want to view the folder where the file was saved or not. You can click yes and email the file right away or click no and email it once you close the program.
CLICK HERE UPLOAD YOUR FILE.
Step 8 – If we have any questions we will email you back. Once this is done, you can close the flash client, unplug everything from your car, and drive it as normal until we return the file to you. We will email back your tuned file within 24-48 hours. If a file is emailed in after 10:00am MST, it will most likely be returned the following business day. If there is a urgency on any tune, please give us a call or put it in the notes and we will try our best to accomondate your needs.
Writing Process:
Step 9 – When you receive the tuned file from us, save it to your computer in the same folder as your original file or somewhere you can remember where it is. Launch the VR Tuned Flash Client by double clicking the VR icon and follow Steps 1 through 4. This time though you will click on the button to Program ECU Memory. The file is labeled with the extension of .mod. If you are flashing back to the original file, choose the “Recovery ECU Memory” and select your saved .org file. Make sure you have your computer plugged in and your car on a battery charger or battery tender. If you incur any issues in the writing process, don’t freak, there is always a solution! If you need help, support, feel nervous, contact our support team. We can do it for you via screen share (must have internet), coach you through it over the phone, or send the jet… We will be happy to do it for you and help you anyway possible.
***Important note after you flash – After you have received your tuned file and loaded to your vehicle, if you have had your vehicle serviced and the firmware updated during this time, whether you are aware or not, DO NOT flash your car again. Doing this will corrupt the ECU because of the mismatching firmware. Your vehicle will not start and you may have to have your ECU repaired or replaced. In the event this happens, we cannot be held responsible and there may be costs involved at your expense. If the firmware was changed, do a new stock read out and we will provide you with a updated tuned file.
If you are trying to flash back to the original file, chose Recover ECU Memory and select your ORG file.

Step 10 – Select your file from the folder where you saved it on your computer by double clicking it. The writing process will start. You are almost there!
Step 11 – The write process will take about the same amount of time as the read process. Just make sure nothing interupts it. You will watch the programming memory bar go across.
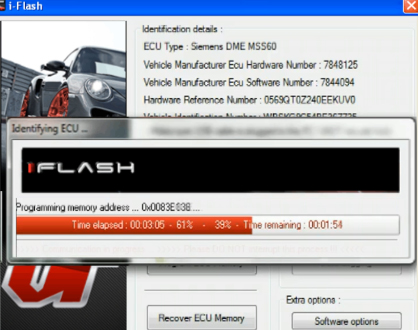
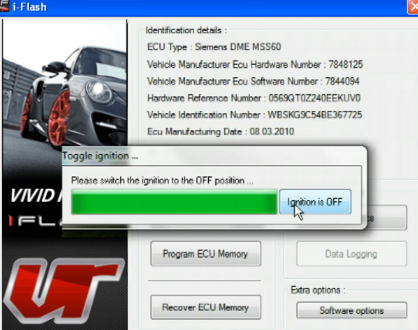
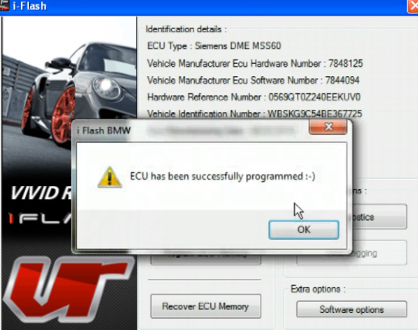
Step 12 – The final step will come and tell you to turn the car off. So switch the ignition off and leave the key in. The green bar will go from full to empty and then give you a successfully programmed window.
Here is a Video Recap of the ENTIRE Process
Step 13 – Close the flash client, unplug the OBDII cable, remove your key, reinsert, and then start your car! You are finished! Take it for a test drive. If you have any concerns or questions, contact us. We are here to help!


