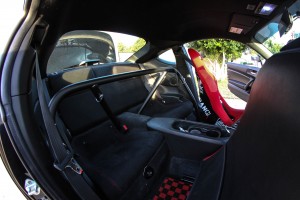
Agency Power Harness Bar Install: Client Submitted
As one of the hottest new vehicles to hit the tuner market, the varied versions of the Scion FR-S, Subaru BR-Z, and Toyota GT-86 are sure to be tracked or driven hard. Along with our full line of specific parts for these cars, Agency Power now has this, the bolt-in harness bar for the weekend racer in you. This new bolt-in harness bar for the BR-Z, FR-S, GT86 can be installed and uninstalled in less then 15 minutes!
The kit is designed in 5 pieces with simple connects that will even allow those that need to leave the main hoop in fold down their rear seats. Factory seat belts are retained, no cutting or drilling, works with racing seats or the standard seat. The harness bar was designed to allow the standard seat to slide all the way in the back position. In addition to being a great safety and style piece, this harness bar connects in 4 positions on the body which adds some serious rigidity.Recently an Agency Power client of took on the short install process and was kind enough to submit install photos.
To purchase the Agency Power Harness Bar for the FRS/BRZ/GT86 click here.
Tools Needed:
- Socket wrench
- 10mm socket
- 14mm socket
Whats included:
Procedure:
1. Start by working in a well lit area with plenty of room, as both doors will need to be fully open.
2. Place both seats into the full up right position so access to the rear seating can be had.
3. Using the 10mm socket remove the rear seat bolt located where the passengers knees would be. (there is one for each side of the vehicle)
4. Remove the rear seat by lifting up the front and pushing down on the center of the backside of the seat while pulling out.
5. Once both rear seat cushions are removed it should look similar to this:
6. Using the 14mm socket loosen and remove both rear seat belt buckles.
7. Next loosen and remove both driver and front passenger 14mm seat belt bolt by the “B-Pillar”.
8. Once removed the spacer and stop washer will need to taken off the bolt and rearranged so that the harness bar sits between the bolt head and the spacer.
9. Now you can begin installing the legs of the harness bar. The bars all only go in the vehicle one way and should sit flush with the body. It is recommended during this process only to finger tighten the bolt so there is some play when fitting the top brace into place.
10. Once the legs are in place, the top cross bar can be installed. Be sure to install the (4) cotter pins before completely tightening the leg bolts.
11. Re-install rear seat cushions with the 10mm bolts and then you can enjoy the new stylish look and added rigidity of the Agency Power Harness Bar.


